
CyberPanel on a VPS: Installation and WordPress on OpenLiteSpeed

CyberPanel installs with one official command on a clean Ubuntu 24.04 or 22.04: on our 2 vCPU, 4 GB server the installation took 8 minutes. A site is created in two clicks, and the panel issues a Let’s Encrypt certificate by itself. “One-click” WordPress installation is paid in the current version, so below is the free route: the database through the panel, the WordPress files by hand. We also cover the firewall separately: after installation it works differently from plain Ubuntu.
We went through every step in this article on a test server: Ubuntu 24.04, CyberPanel installer v3.0.7, panel in English. The screenshots and command output are real; the addresses and passwords in them are test ones.
What CyberPanel and OpenLiteSpeed are
CyberPanel is a hosting control panel with a web interface: sites, databases, certificates and backups without editing configs. OpenLiteSpeed is the free edition of the LiteSpeed web server; it serves pages instead of the usual Apache or nginx. The panel and the web server come as a pair, and the main reason to pick it is the page cache built into the web server itself: WordPress runs noticeably faster with it on weak hardware.
If you want classic nginx, see how to install a LEMP stack; for which panel to take in general, read “Which control panel to choose”.
Server requirements
The installer is designed for a clean system. If the server already has a web server, another panel or a mail stack, you will get port conflicts and a broken installation.
| Parameter | Minimum per documentation | Comfortable |
|---|---|---|
| OS (clean install) | Ubuntu 22.04 or 24.04, AlmaLinux 8/9 | Ubuntu 24.04 |
| Memory | 1 GB | 2 GB or more |
| Disk | 10 GB free | 20 GB or more |
| CPU | 1 vCore | 2 vCore |
Ubuntu 26.04 is not on CyberPanel’s list of supported systems, so for a new server take 24.04. What we got: right after installation (with no sites) 691 MB of 3916 MB was in use, and with a running WordPress site about 920 MB. That is without Memcached, Redis, mail, DNS and FTP. On 1 GB (the Naos plan) it will be tight; we did not test that, so take Haedus (2 GB) or Brachium (4 GB), especially if you will have several sites.
Two routes: a VPS with the panel or a manual install
When you order a Linux VPS at UFO.Hosting you can choose a panel right away on any plan, and CyberPanel is on the list. If you chose it at order time, skip the installation and go to the first login; the panel address and password are in the service details. The second route is a clean Ubuntu and a self-install, which is what we walk through: it shows exactly what gets installed on the server. You will need to connect over SSH.
Preparing Ubuntu
On a freshly created server the system installs updates in the background by itself and holds the package manager lock. If the installer prints nothing for the first few minutes, that is normal: it is waiting for apt to become free. Wait and don’t interrupt anything.
Update the system: the installer puts dozens of packages on the machine, and failures are more likely on an outdated base.
sudo apt update && sudo apt upgrade -yapt update— refreshes the package list without installing anything;apt upgrade -y— installs new versions;-yanswers “yes” to the questions;&&— the second command runs only if the first finished without an error.
If the system asks for a reboot (for example, the kernel was updated), run sudo reboot and connect again.
Now look at the ports in use. CyberPanel needs ports 80 and 443 (sites), 8090 (the panel itself) and 7080 (WebAdmin, which manages OpenLiteSpeed itself) to be free.
sudo ss -tlnp-t— TCP only,-l— only ports that something is listening on;-n— numbers instead of names,-p— which program holds the port.
On a clean Ubuntu 24.04 our list was short: port 22 (SSH) and the service addresses 127.0.0.53 and 127.0.0.54 on port 53 (the system’s local DNS cache). There should be no lines with :80, :443, :8090 or :7080. If there are, free the port or reinstall the system.
Installing CyberPanel: the command and the installer’s questions
The installer is run as root. Open a root session and paste the official command: it downloads the script from the CyberPanel site and passes it to the shell.
sudo -i
sh <(curl https://cyberpanel.net/install.sh || wget -O - https://cyberpanel.net/install.sh)
sudo -i— a root session; running it assudo sh <(...)may fail because of how the shell works;curl ... || wget -O - ...— if curl fails, it tries wget;- the “download and run immediately” pattern runs someone else’s script as root; if the server holds valuable data, download the file first and read through it.
First the installer detects the system by itself and shows what it found: the version (ours was CyberPanel Installer v3.0.7), Ubuntu 24 and a resource check. Then the questions begin. Here they are in the order they appear, with our answers.
- Main menu.
1. Install CyberPanel/2. Exit. Answer: 1. The check line is shown here too:RAM check : 503/3916MBandDisk check : 2/38GB (Minimal 10GB free space). It shows at once whether resources are sufficient. - Web server.
1. Install CyberPanel with OpenLiteSpeed,2. Install Cyberpanel with LiteSpeed Enterprise. Answer: 1. Enterprise requires a paid licence. - Full installation.
Install Full service for CyberPanel? This will include PowerDNS, Postfix and Pure-FTPd. Full installation [Y/n]. Answer:n. These are three services that eat memory and open extra ports. DNS is usually run by the registrar, and files are easier to upload over SFTP. You don’t need the mail stack: port 25 on a UFO.Hosting VPS is closed until the account is verified, so it will not fully work. - Three separate questions. After
nthe installer still asks about each service:Install Postfix? [Y/n],Install PowerDNS? [Y/n],Install PureFTPd? [Y/n]. Answernto each. - Remote MySQL.
Remote MySQL [y/N]. Needed only if the database lives on another server. Answer:n; you get a local database (ours was MariaDB 10.11). - Version. An offer to press Enter for the latest version or type a number. Answer: Enter.
- Admin password. The question is
Choose [d]efault, [r]andom or [s]et password: [d/r/s]. Don’t take the default password (1234567); everyone knows it. We pressed Enter and got a random one: the installer wroteAdmin password will be provided once installation is completed. The password will be in the final summary. You can choosesand set your own. - Memcached and Redis. In-memory data caches that will be useful later. We answered
nto both. - Watchdog.
Please type Yes or no (with capital Y, default Yes). It watches the web server and the database. The hint about a capital Y refers to the positive answer; the installer accepted ourno. We chose it to get the minimum of services.
After the answers a long stream of lines begins without your involvement. The log may flash an error about the quota module: modprobe: FATAL: Module quota_v2 not found in directory /lib/modules/.... On our server the installation continued after it and finished successfully, so there is no need to stop because of this line.
At the end the installer prints a summary: CyberPanel Successfully Installed, the time (ours was Installation time : 0 hrs 8 min 0 sec), the address https://SERVER-IP:8090, the login admin and the password. Save it in a password manager. The last question is Would you like to restart your server now? [y/N]; a reboot is not required: we answered N and the panel worked.
First login to the panel
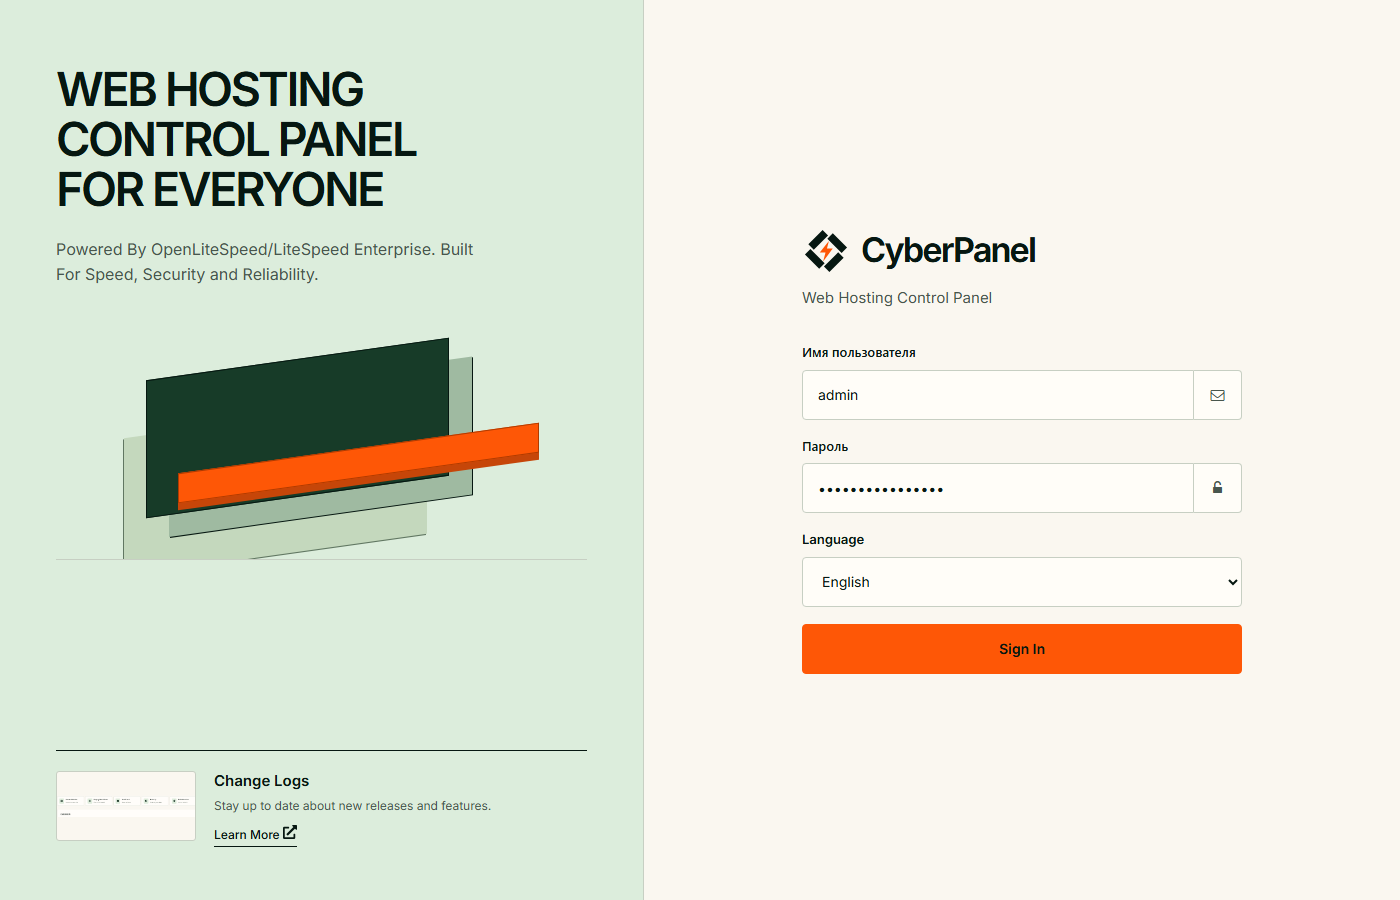
Open https://SERVER-IP:8090 in a browser. The panel has a self-signed certificate, so the browser will most likely warn about an insecure connection. Encryption still works; confirm the transition manually. The login form asks for the login admin, the password from the summary and a separate field for the two-factor code (leave it empty if you haven’t enabled it).
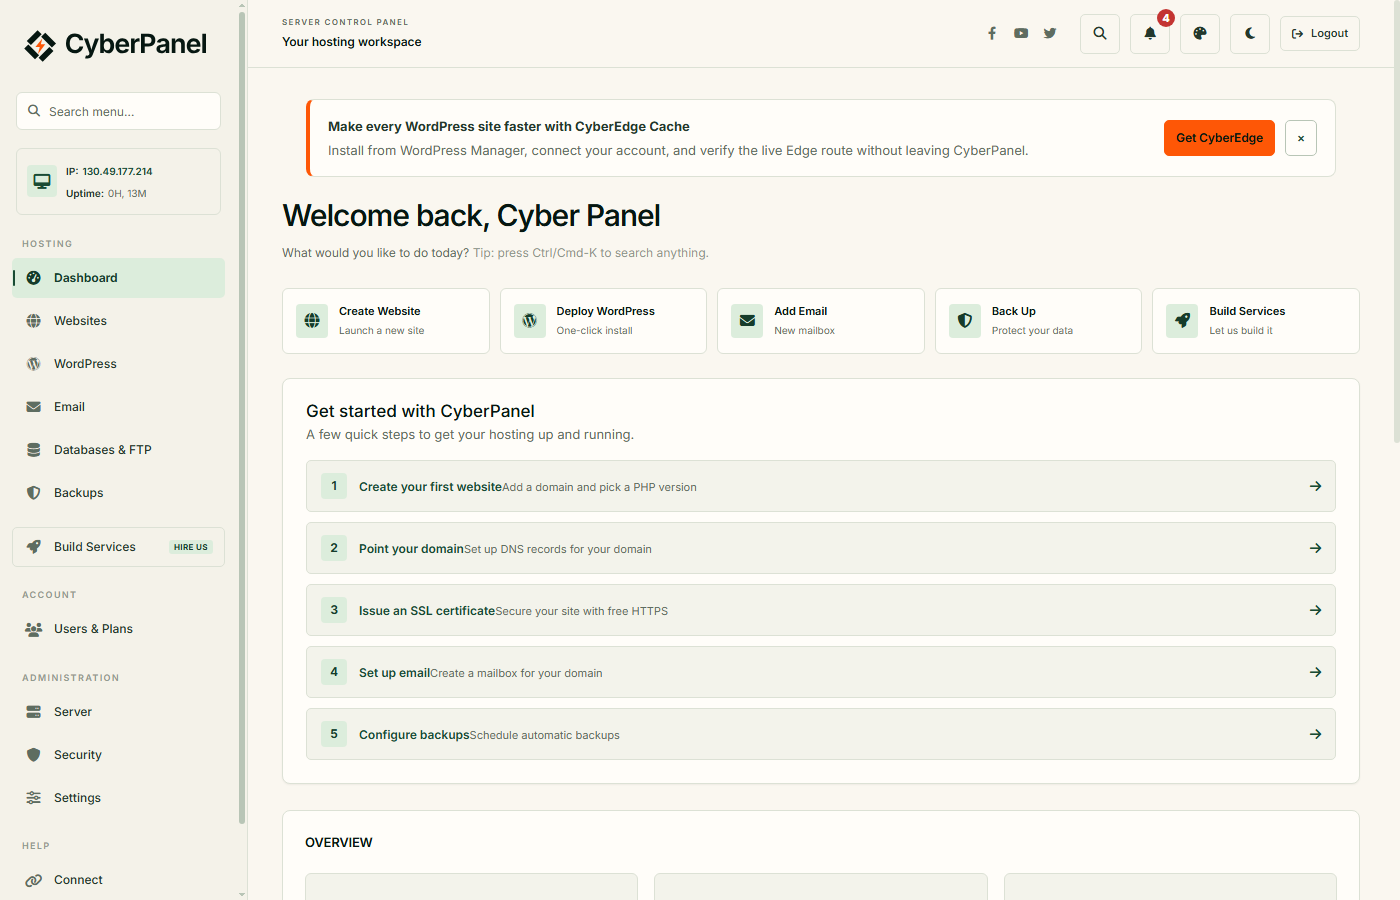
After you log in, the main page opens. The left menu has these sections: Dashboard, Websites, WordPress, Email, Databases & FTP, Backups, Users & Plans, Server, Security, Settings. It is better to change the admin password to your own right away: look for the admin user in Users & Plans.
The firewall: everything differs from plain Ubuntu
The main difference from plain Ubuntu: the CyberPanel installer removes UFW (the ufw program is gone after installation) and installs firewalld with its own set of rules. If you type sudo ufw ... out of habit, you will get command not found. Don’t enable UFW on top of firewalld: two firewalls on one machine conflict. View and change all rules in the panel itself: Security → Firewall.
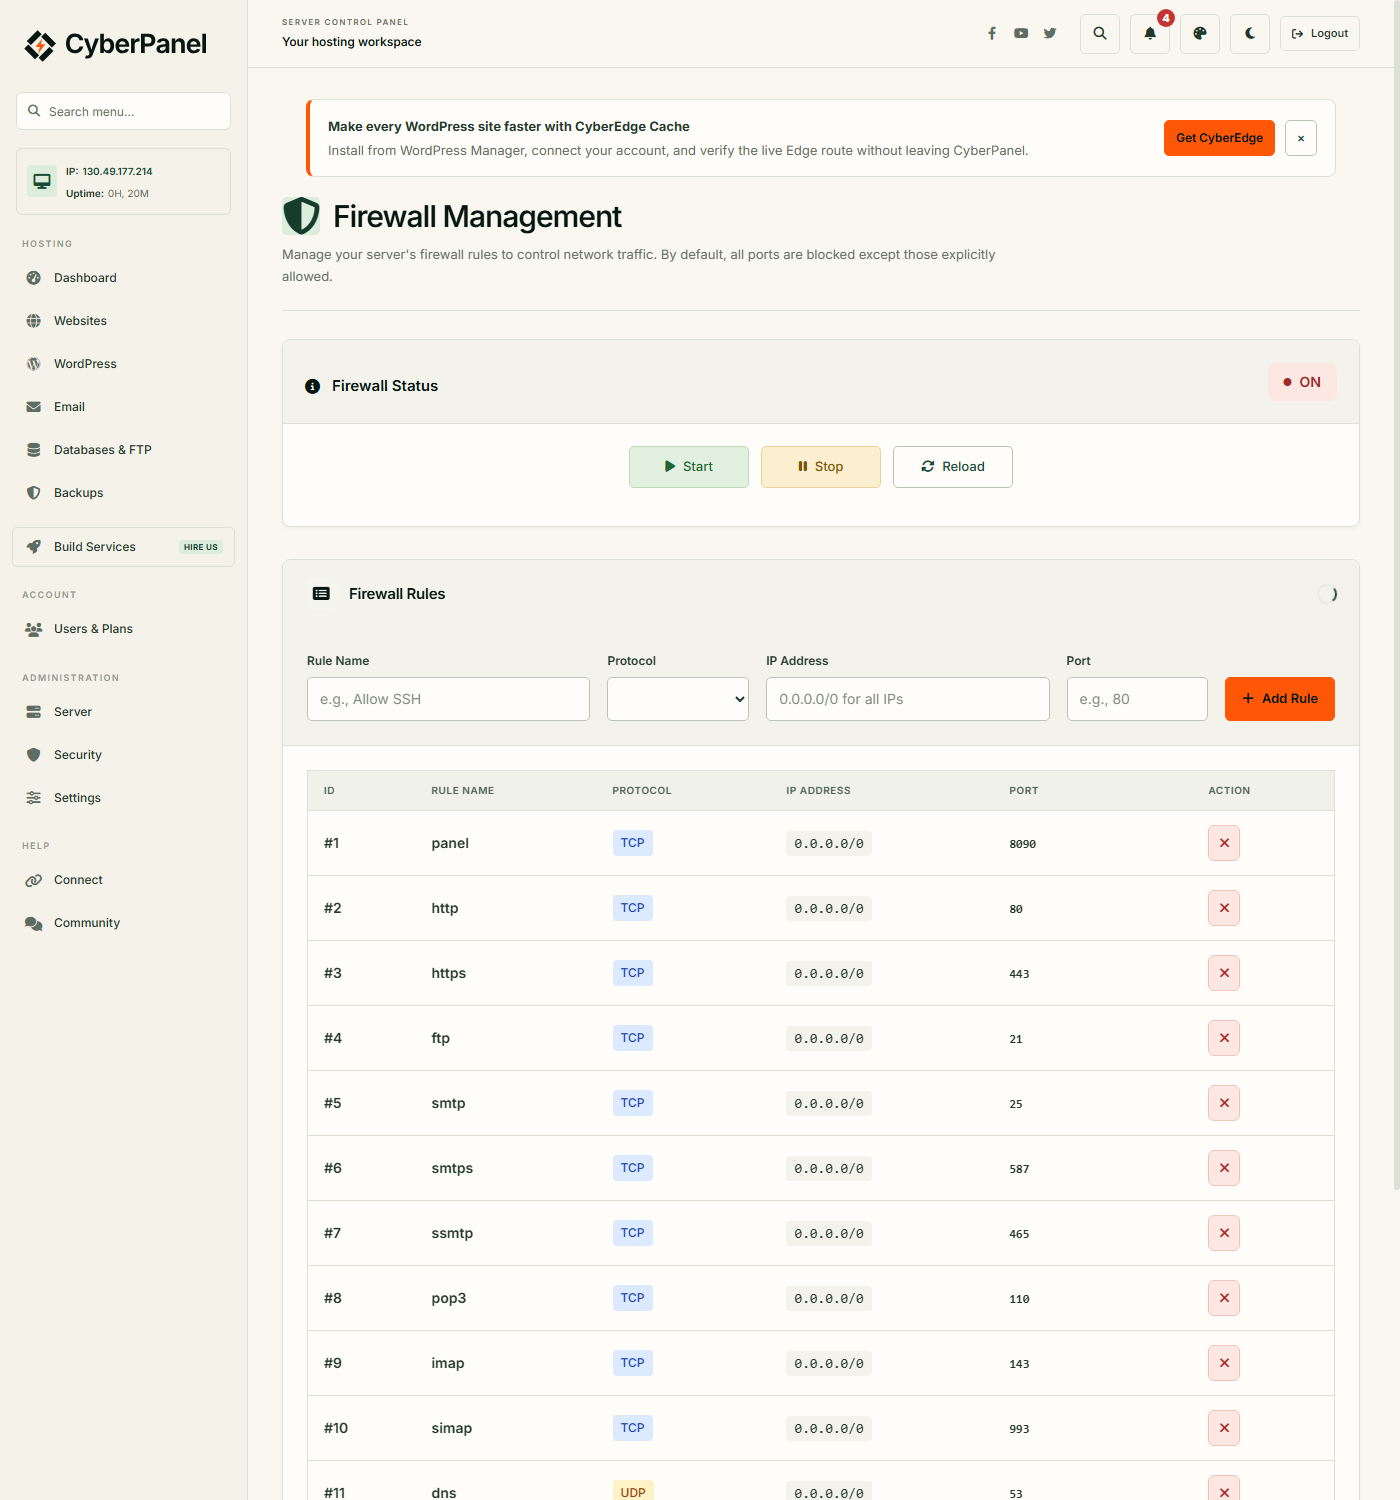
What we saw right after installation (having declined mail, DNS and FTP). The list has 15 rules open to all addresses (0.0.0.0/0):
- 8090 — the panel itself;
- 80, 443, 443/UDP — sites (including QUIC);
- 21 and 40110-40210 — FTP;
- 25, 587, 465, 110, 143, 993, 995 — mail;
- 53 TCP and UDP — DNS.
We did not install the mail, FTP and DNS services, so nothing listens on those ports and they look harmless when open. But the less is open, the better: delete everything you don’t use. Also, port 7080 is not in this list, although it is open to the whole internet too (the rule sits in firewalld and is not shown in the panel). We checked from outside: the WebAdmin login page https://IP:7080 answered anyone. firewalld also has a rule for port 8888; we did not find out what it is for, so close it only after checking that you don’t need it.
Allow only yourself on 8090
The panel controls the whole server, so port 8090 should be open only to your address. Find your external IP (any “what is my IP” service), then on the Firewall page fill in the form at the top: a rule name (for example panel-only-me), protocol TCP, your IP and port 8090, and click Add Rule. After that, delete the panel rule for 0.0.0.0/0 on port 8090: use the button with the cross in its row. There is no confirmation on deletion; the rule disappears at once.
We checked the result from two addresses: from the allowed one the panel opened (response code 200), from the others the connection stayed silent until the timeout, and the sites on 80 and 443 kept working.
If your home IP changes, you will lose access to the panel. You can get it back over SSH with one command (substitute the new address):
sudo firewall-cmd --permanent --add-rich-rule='rule family="ipv4" source address="203.0.113.10" port port="8090" protocol="tcp" accept'
sudo firewall-cmd --reloadfirewall-cmd— manages firewalld from the terminal;--permanent— save the rule for good rather than until a reboot;--reload— apply the saved rules.
Closing 7080
WebAdmin on 7080 is rarely needed. We close it in firewalld, since the panel has no rule for it:
sudo firewall-cmd --permanent --remove-rich-rule='rule family="ipv4" source address="0.0.0.0/0" port port="7080" protocol="tcp" accept'
sudo firewall-cmd --permanent --remove-rich-rule='rule family="ipv6" port port="7080" protocol="tcp" accept'
sudo firewall-cmd --reload
Two commands because the rule exists separately for IPv4 and IPv6. Each should answer success. Check: the page https://IP:7080 no longer opens, and the sites work. When you need WebAdmin, go in through an SSH tunnel: ssh -L 7080:127.0.0.1:7080 root@SERVER-IP, then open https://127.0.0.1:7080 on your machine. If your home IP changes, it is just as convenient to reach the panel that way: close 8090 completely and forward that port through a tunnel.
Want to repeat the installation on your own server? The promo code WIKI15 gives 15% off a VPS order at UFO.Hosting.
Creating a site and pointing a domain
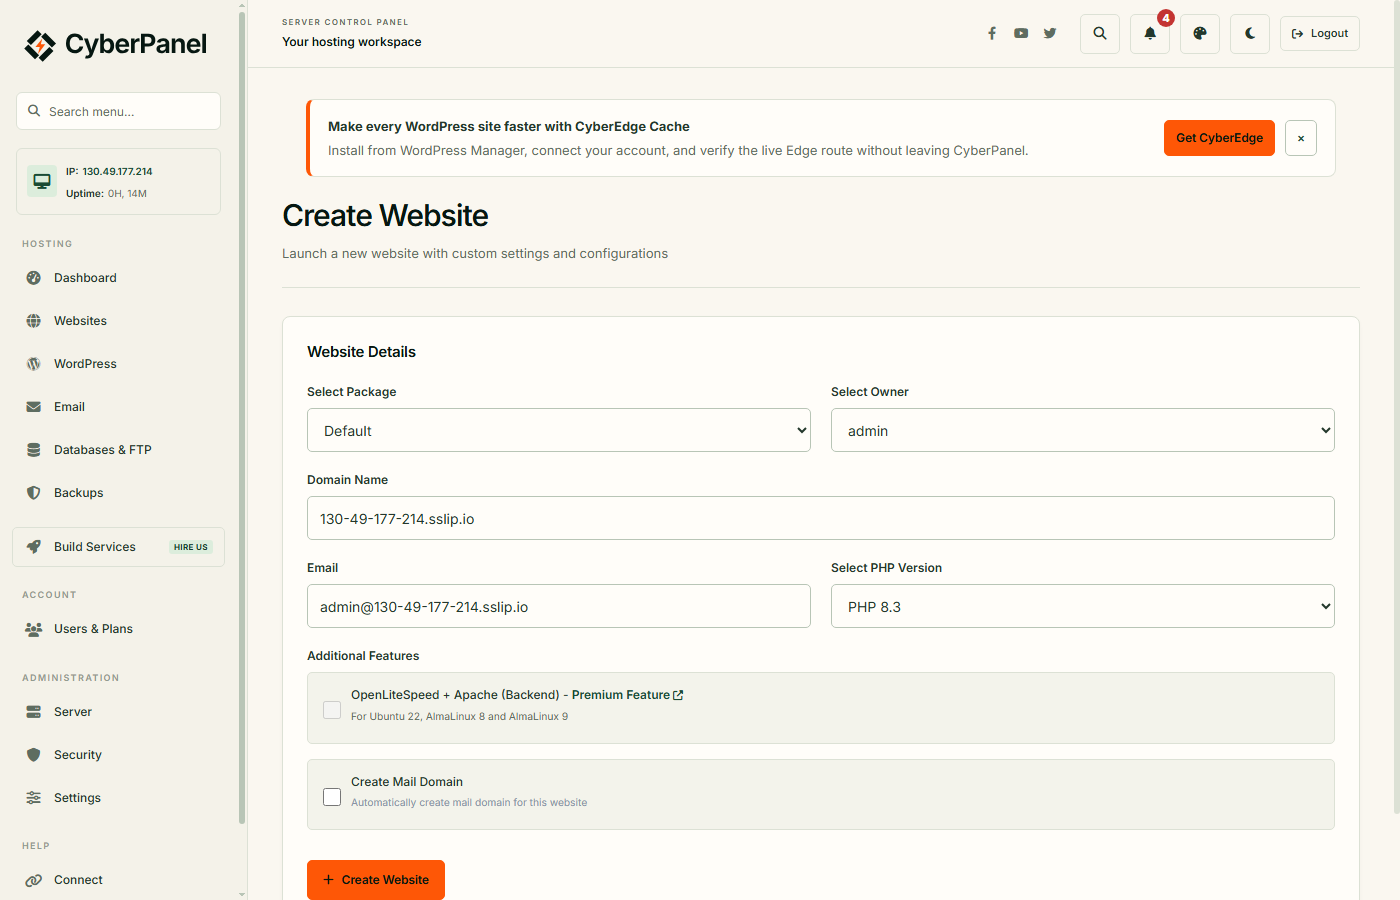
In the left menu open Websites → Create Website. The form is simple: package (Default), owner (admin), domain, e-mail and PHP version. Our list of versions ran from 8.1 to 8.5; take the one your plugins support, usually 8.3. Don’t tick Create Mail Domain, since we did not install mail. The OpenLiteSpeed + Apache (Backend) field is marked as paid, so we skip it. There is no SSL field in this version: the panel issues the certificate itself when the site is created.
The domain must already point to the server. In the DNS at your registrar create an A record: the name @ and the value of your VPS IP; for www add one more A record or a CNAME. You can also register a domain with us at UFO.Hosting. Check:
dig +short example.com AThe command asks DNS where the domain points; substitute your own. You should see your VPS IP. Empty or someone else’s address means the records have not propagated yet, which takes from a few minutes to a couple of hours. If you don’t have the dig utility, install the dnsutils package.
Click Create Website. The panel shows an Installation Progress bar with stages; one of them will say Setting up SSL... After a few seconds the site appears in Websites → List Websites.
The Let’s Encrypt certificate
Let’s Encrypt is a free certificate authority. To issue a certificate it connects to port 80 of your server by the domain name and checks that the site is yours. So you need both the A record and an open port 80.
Our certificate was issued right when the site was created. Check: SSL → Manage SSL, select the domain. In the SSL Certificate Status block you should see Status: Active, Issued By: Let's Encrypt and a validity of about three months (ours showed Days Remaining: 89 days). The panel renews the certificate itself. If the status is different, for example the domain did not yet point at the server, click Issue SSL after DNS starts working.
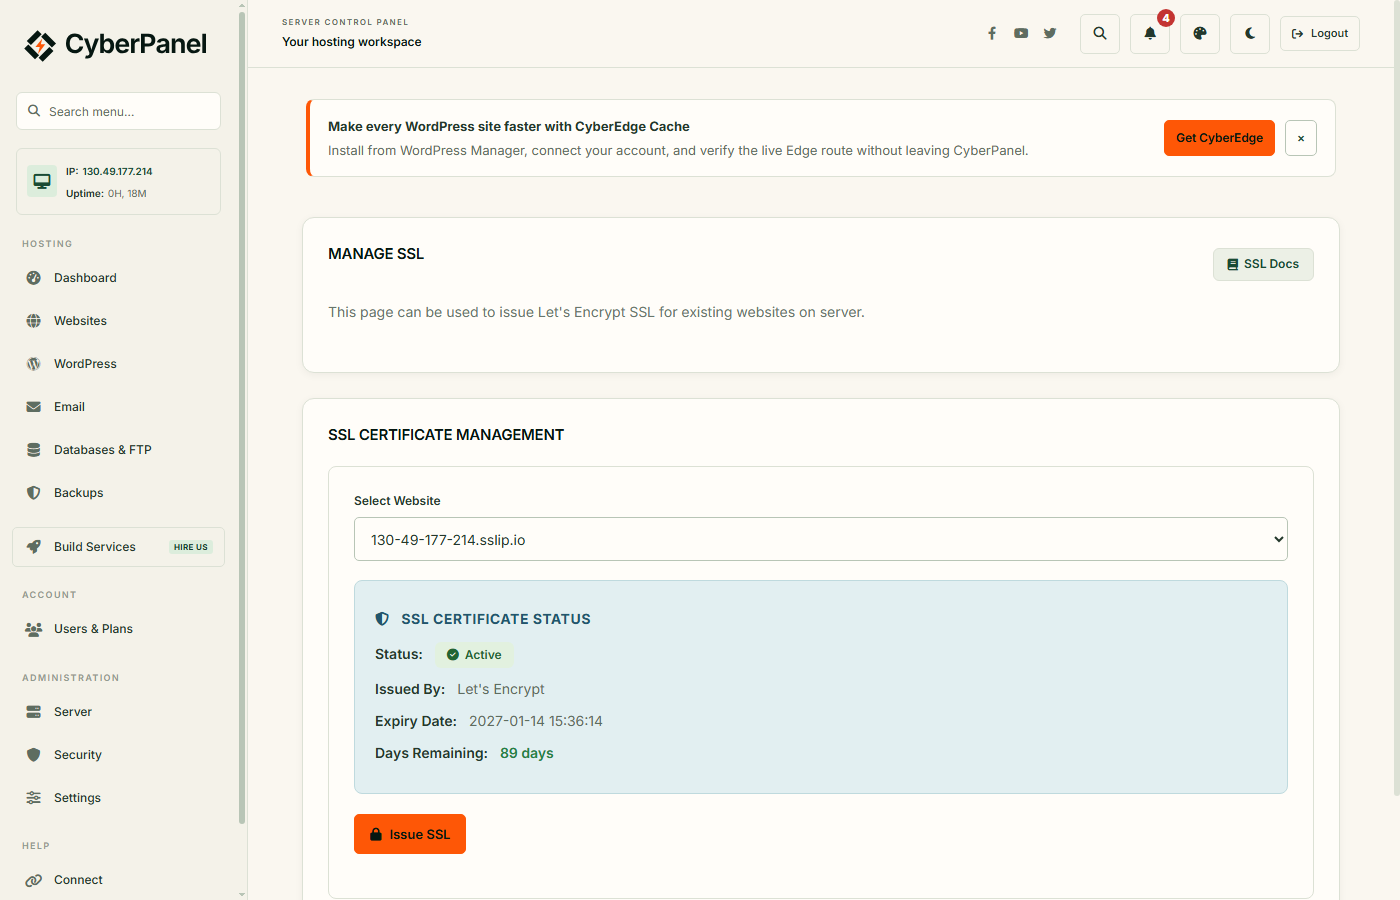
To test without your own domain you can use a service name like 130-49-177-214.sslip.io (the digits are the server IP with hyphens): it points to that IP, and Let’s Encrypt issued a certificate for it too. A real site needs your own domain.
WordPress on CyberPanel: a paid button and a free route
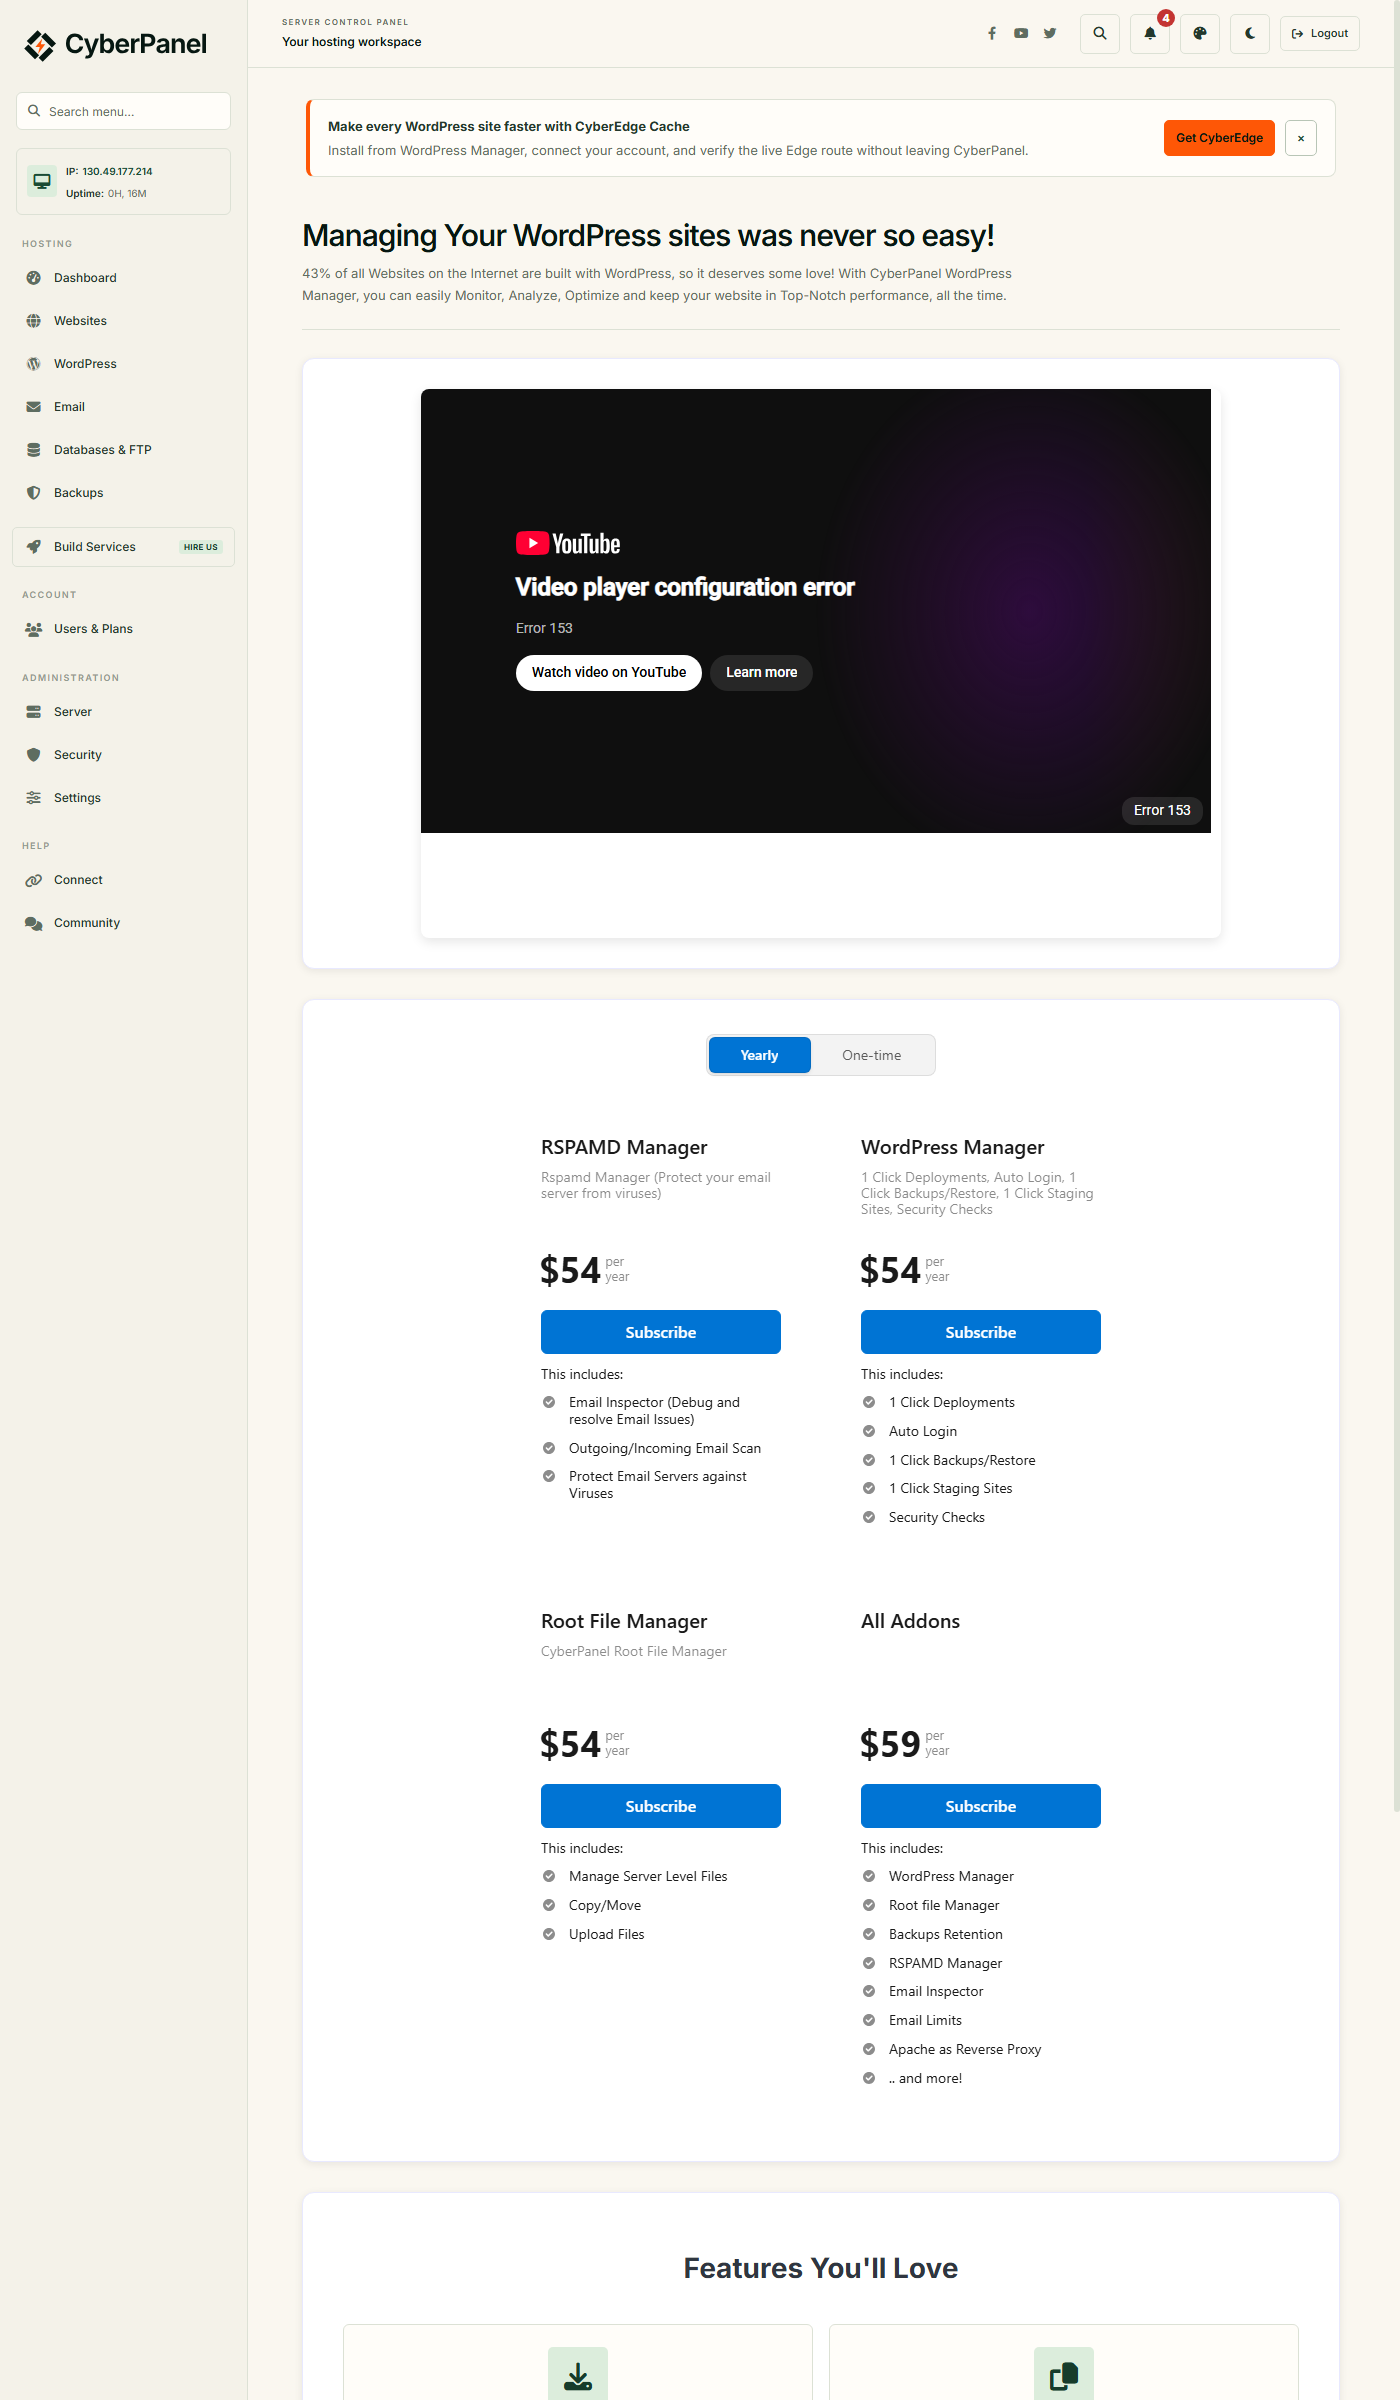
The main page has a Deploy WordPress tile, and the menu has a WordPress section. Right now they lead not to an installer but to a pricing page: WordPress Manager is paid in this version (the page lists 54 dollars a year, and the “All Addons” bundle for 59). It gives one-click installation, auto-login, backups and staging. For one site none of this is necessary: below is the free manual installation, which takes a few minutes.
Step 1. The database
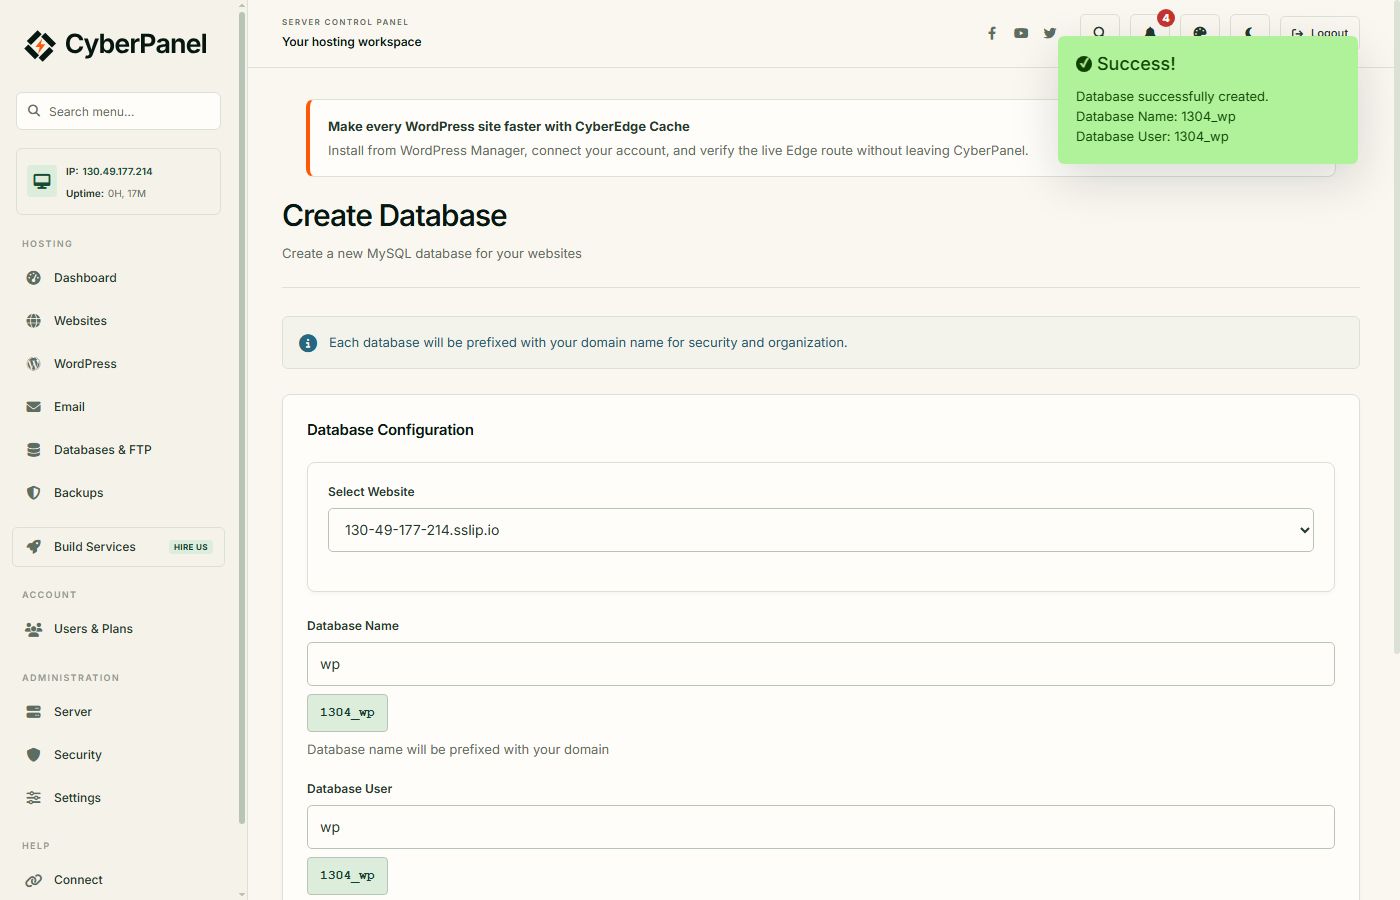
Open Databases & FTP → Create Database. Choose the site, come up with a database name, a user name and a password (the Generate button will create one). The panel adds a prefix from the domain to the name and shows the result. For a site with a test name we got the database 1304_wp and the user 1304_wp. Write down the final names: WordPress will need exactly those. Save the password right away, in a password manager.
Step 2. The WordPress files
Every site in CyberPanel has its own system user and the directory /home/DOMAIN/public_html. Find the user name with a command: the directory belongs to that user.
ls -ld /home/example.com/public_htmlIn the output the third word is the owner (ours was something like sslip6933; the name is built from the domain and digits). Next we download WordPress, put it in the site directory and give the files to that user. Substitute your own domain and your own owner.
cd /tmp
wget https://wordpress.org/latest.tar.gz
tar xzf latest.tar.gz
rm -f /home/example.com/public_html/index.html
cp -a wordpress/. /home/example.com/public_html/
chown -R OWNER:nogroup /home/example.com/public_html
find /home/example.com/public_html -type d -exec chmod 755 {} \;
find /home/example.com/public_html -type f -exec chmod 644 {} \;wgetandtar xzf— download and unpack the latest WordPress into thewordpressdirectory;rm -f .../index.html— remove the placeholder the panel puts in a new site;cp -a wordpress/. ...— copy the contents including hidden files;chown ... :nogroup— the site owner and the group, as for the other files in the directory;chmod 755and644— directories can be entered and files can be read; otherwise the web server returns 403.
If you prefer to avoid the terminal, the same files can be uploaded through File Manager on the site page (Websites → Manage → File Manager) or over SFTP. When you open the site in a browser, you should see the WordPress page Setup Configuration File: that is what we had.
Step 3. The WordPress installation wizard
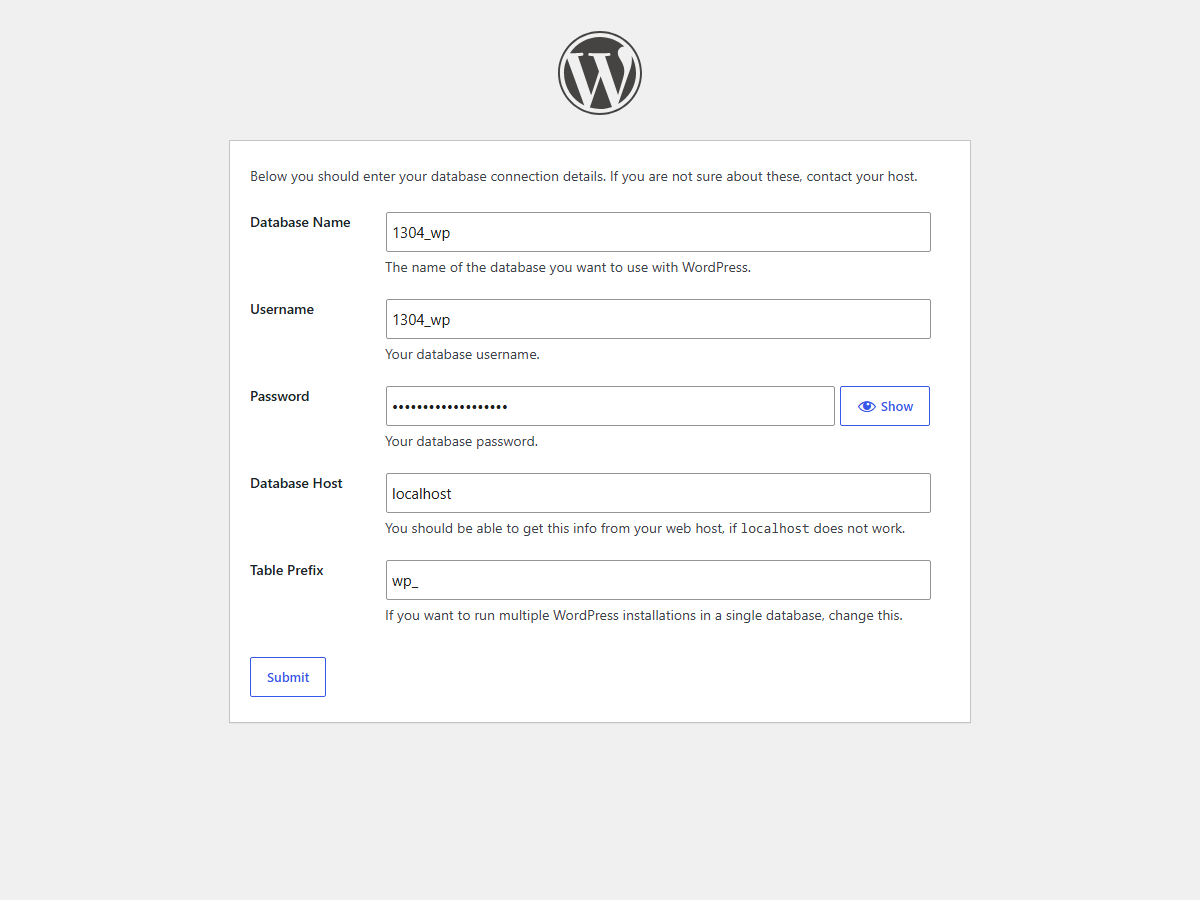
Open https://your-domain/, choose a language and continue. On the database connection form enter: the database name and user from step 1, the password, and the host localhost. You can leave the table prefix as wp_. If the details are right, WordPress will say it connected and offer to run the installation.
Next set the site title, the WordPress administrator login and password (this is not the panel’s admin; don’t use the obvious name admin) and an e-mail. While the site is under development you can tick “Discourage search engines from indexing this site”. After you click Install WordPress you will see Success!, then log in at https://your-domain/wp-admin.
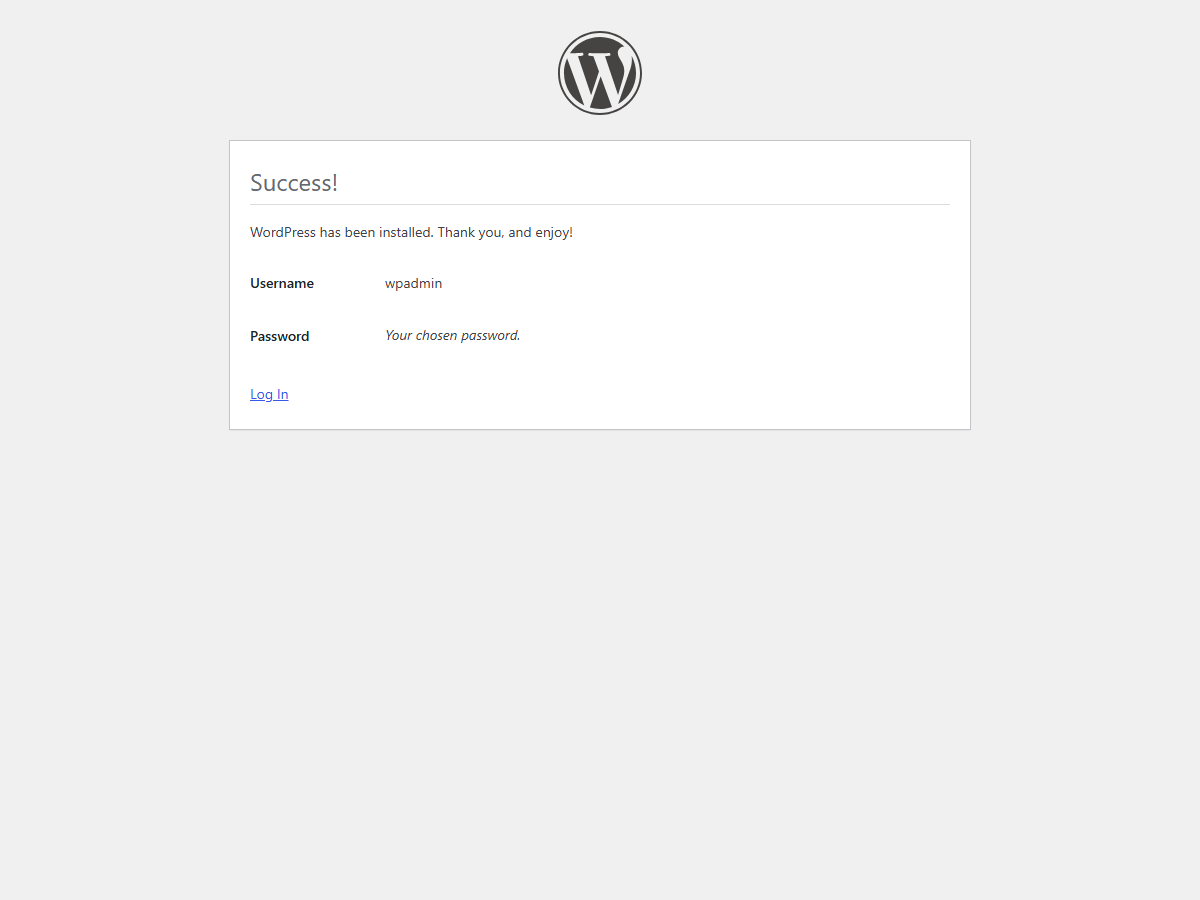
For more detail on installing it on any server, see our article on WordPress on a UFO.Hosting server.
OpenLiteSpeed and LiteSpeed Cache: where the speed comes from
Ordinary WordPress rebuilds the page on every visit: database queries, PHP, templates. LiteSpeed Cache builds it once and stores it ready-made. For the next visitor the web server returns HTML without touching PHP or the database. The cache itself lives in OpenLiteSpeed, and the plugin manages it: what to cache and when to reset it. That is why on 1–2 GB a site handles more visitors; how many times more depends on the theme and plugins.
The plugin installs for free: in the WordPress admin open Plugins → Add New, find LiteSpeed Cache, click Install Now, then Activate. Ours installed version 7.9.1; a LiteSpeed Cache item appeared in the left menu.
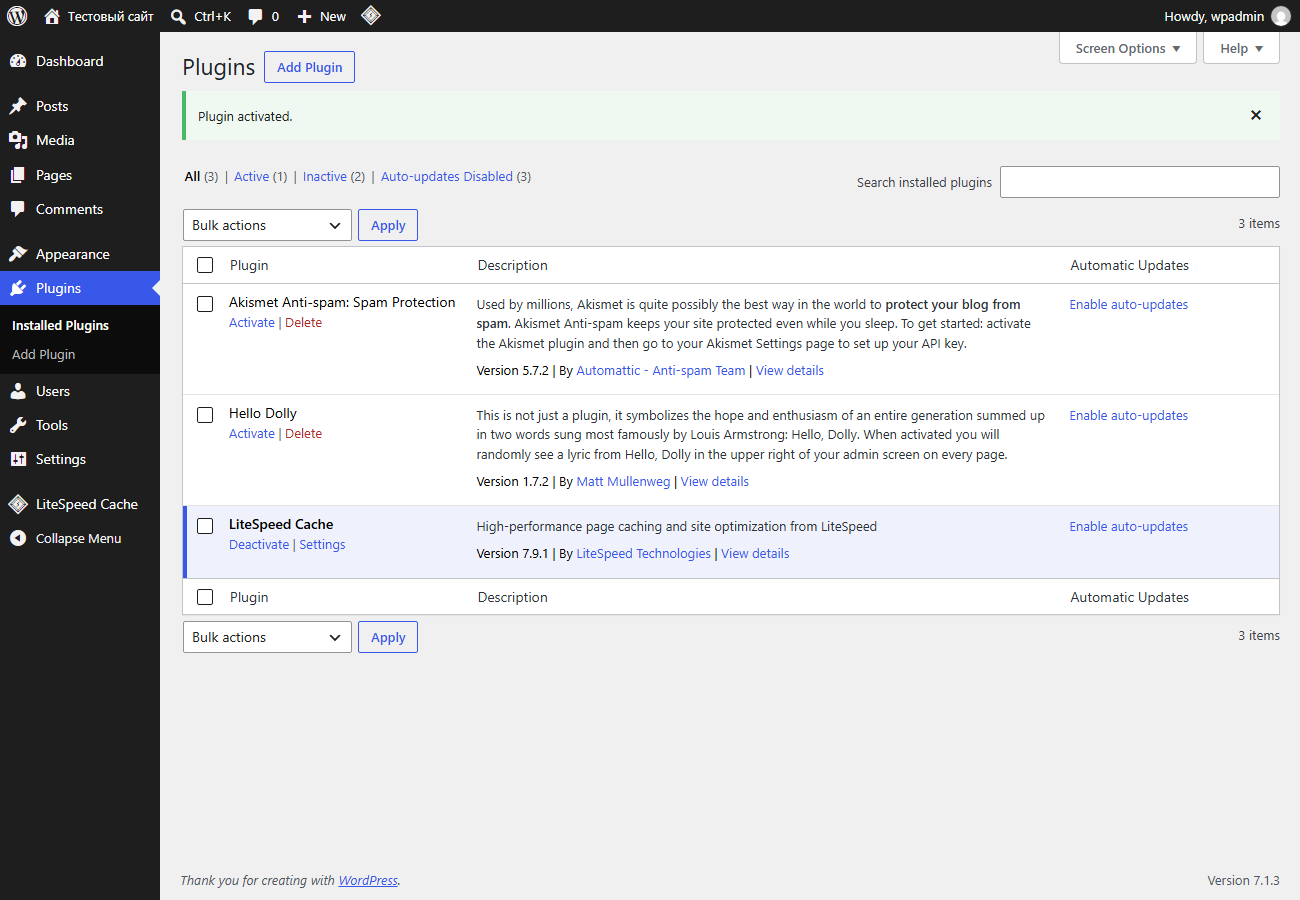
You can check the cache from any computer, without logging in to WordPress:
curl -s -D - -o /dev/null https://your-domain/ | grep -i x-litespeed-cache-D -— print the response headers;-o /dev/null— discard the page body;grepkeeps only the lines about the LiteSpeed cache.
The first request after clearing the cache returned x-litespeed-cache: miss (the page was rebuilt and put in the cache), the second and third returned x-litespeed-cache: hit (served from the cache). Only hit on repeated requests shows the cache works. A request with -I is not suitable for this check: in our test it did not show the x-litespeed-cache header at all, so use a regular request as above. Turn on the plugin’s optimisations (CSS and JS merging, lazy loading) one at a time and see whether the layout breaks.
Backup and updating the panel
Backups are in the Backups section: a site copy and a schedule. A copy on the same disk will not save you if the server is lost, so set up an external location: another server or S3-compatible storage. The principle is visible in our article on backups with Hestia, even though the panel there is different. Take a fresh copy before any update.
Update the panel regularly. In the final summary the installer itself reminds you of the commands: cyberpanel help — help, cyberpanel utility — service tools, cyberpanel upgrade — update to the latest version. Run them from a root session.
cyberpanel upgradeThe command updates the panel in place. After it, the panel on 8090 should open with the new version.
CyberPanel downsides
CyberPanel has a difficult security history. In October 2024 vulnerabilities were found in versions around 2.3.6-2.3.7 (CVE-2024-51567 and CVE-2024-51378): commands could be executed on the server through the panel without a password. They were used in real attacks on exposed panels. The holes were closed by an update, but a panel with access to the whole server still should not be visible on the internet, and it has to be updated on time. That is why we restricted 8090 by IP and closed 7080.
There are three more downsides. Paid features keep growing: one-click WordPress installation, as we saw, is sold separately in the new version. The panel is built for a narrow range of systems (Ubuntu, AlmaLinux, Rocky and relatives); on Debian and rare distributions it may run unstably. And it can only be installed on an empty server, not on top of a working site. If predictability matters more to you than speed, look at the panel comparison and the first site in Virtualmin.
Common errors
| Symptom | Cause | What to do |
|---|---|---|
sudo ufw ... answers command not found |
The CyberPanel installer removed UFW and installed firewalld | Rules are in the panel (Security → Firewall) or through firewall-cmd |
The panel does not open on :8090 |
Your IP changed after the port was restricted, the port is closed or the service is not running | Over SSH add a firewall-cmd rule with the new address (see above); check the service with sudo systemctl status lscpd |
| The installer prints nothing for the first few minutes | The system installs updates in the background and holds the apt lock |
Wait; don’t interrupt |
| The certificate is not issued | The domain does not point to the server or port 80 is closed | Check dig +short your-domain A and the rules for 80; wait for DNS and click Issue SSL |
| The Deploy WordPress button leads to a pricing page | WordPress Manager is a paid add-on | Install WordPress manually following the steps above |
| The server hangs, the site returns errors | Not enough memory | Add swap, don’t enable Memcached and Redis, consider a plan with 2 GB or more |
| The installer broke off | Not enough memory or the system was not clean | Reinstall the OS and repeat; don’t run it on top of a failed installation |
FAQ
Is CyberPanel free?
The panel itself with OpenLiteSpeed is free and has no limit on the number of sites. Paid add-ons, such as WordPress Manager, are sold separately, and the version with LiteSpeed Enterprise requires a licence.
Is 1 GB of memory enough for CyberPanel?
That is the formal minimum per the documentation. We tested on 4 GB: after installation 691 MB is in use, and with one WordPress site about 920 MB. On 1 GB there will be almost no headroom, so add swap and don’t enable extra services. For several sites take 2 GB or more.
Which Ubuntu suits CyberPanel?
Ubuntu 22.04 and 24.04 are officially supported. We went through the installation on 24.04. Ubuntu 26.04 is not on the list of supported systems.
Do you need CyberPanel’s mail server?
No, you can skip it during installation. On a UFO.Hosting VPS port 25 is closed until the account is verified, so the built-in stack cannot fully receive and send mail anyway.
How do you protect the CyberPanel panel from being hacked?
Change the admin password, restrict port 8090 to your IP on the Security → Firewall page, close port 7080 and update the panel on time. If you log in rarely, keep the port closed completely and go in through an SSH tunnel.
Ready to start? Order a VPS on UFO.Hosting and choose CyberPanel in the list of panels.
Related
All articles
Nextcloud on a VPS: your own cloud with Docker Compose
Nextcloud is a cloud you own: files synced to your phone and computer, a calendar, contacts, and share-by-link. On a VPS you run it with Docker Compose as five containers: Nextcloud itself, a PostgreSQL database, a Redis cache, a container…

How to Install n8n on a VPS with Docker Compose
You can run n8n on your own VPS with Docker Compose in a single evening: two containers (n8n itself and Caddy, a reverse proxy that issues the HTTPS certificate for you), three small files and one start command. Below you…