
Nextcloud on a VPS: your own cloud with Docker Compose

Nextcloud is a cloud you own: files synced to your phone and computer, a calendar, contacts, and share-by-link. On a VPS you run it with Docker Compose as five containers: Nextcloud itself, a PostgreSQL database, a Redis cache, a container for background jobs, and Caddy, which fetches the HTTPS certificate. This guide gives you the ready-made files, the settings that clear the warnings in the admin panel, a backup routine and the upgrade path. We installed Nextcloud 35.0.2 (Hub 26 Summer) on Ubuntu 24.04, and every output below comes from that server.
What you get, and how much memory and disk you need
You end up with a cloud on your own domain, with an encrypted connection and its own database. Files live on your server’s disk, not with a third-party service.
Measured on a fresh install with no users, idle:
| Container | Memory |
|---|---|
| nextcloud | 208 MB |
| db (PostgreSQL) | 69 MB |
| redis | 12 MB |
| caddy | 14 MB |
| cron | 2 MB |
That is about 300 MB in total. Real use (people logged in, photo uploads, previews) pushes the numbers up, so leave headroom. The Nextcloud documentation recommends at least 512 MB for each PHP process (one process handles one request), and several can run at once. As a rule of thumb, not a guarantee: 2 GB is enough for one or two users, and 4 GB is safer for a family or a small team. In the UFO.Hosting VPS range these are the plans with 2 and 4 GB of memory; check the pricing page for current specs.
Now disk. The images take about 2.7 GB (Nextcloud 2.13 GB, PostgreSQL 424 MB, the rest is small). After installation the Nextcloud volume took another 914 MB and the database volume 71 MB. Your own files come on top of that.
What to prepare
- A VPS with Docker. The installation is covered in the Docker and Compose article.
- A domain or subdomain, for example
cloud.example.com, with an A record pointing to the server’s IP. The record must resolve before you start: Caddy asks for a certificate right away. Check it withgetent hosts cloud.example.com. - Free ports 80 and 443. If
ufwis on, open them:sudo ufw allow 80/tcpandsudo ufw allow 443/tcp. For ports published by Docker this is a formality, since Docker opens them itself, but the rules help if your setup changes later.
If ports 80 and 443 are already taken by another program (nginx, a control panel), the Caddy from this guide will not start. Docker answers address already in use when a program on the host holds the port, and port is already allocated when another container does. Then either free the ports or put Nextcloud behind the web server you already run, with that server acting as the reverse proxy.
Why five containers
- nextcloud is the service itself. We use the
apacheimage variant because it already includes a web server. - db is PostgreSQL. Nextcloud can also run on built-in SQLite (a database in a single file), but its documentation says that is for testing and very small setups only. Start with a proper database: moving data later is harder.
- redis is a fast cache. It keeps file locks out of the database. A lock stops two clients from writing the same file at the same moment. The Nextcloud image picks Redis up on its own once you give it the address.
- cron runs Nextcloud’s background jobs: cleanup, indexing. Same image, only the start command differs.
- caddy is a reverse proxy: a program that accepts requests from the internet on ports 80 and 443, passes them to Nextcloud, and gets and renews the certificate by itself.
Project files
mkdir ~/nextcloud && cd ~/nextcloudThe .env file. It is a set of variables that Compose substitutes into compose.yaml. It holds the domain and the passwords, and we generate the passwords at random:
cat > .env <<EOF
DOMAIN=cloud.example.com
POSTGRES_PASSWORD=$(openssl rand -hex 24)
NEXTCLOUD_ADMIN_USER=admin
NEXTCLOUD_ADMIN_PASSWORD=$(openssl rand -hex 12)
EOF
chmod 600 .env
Replace cloud.example.com with your domain. The administrator password is written into this file and you will use it to log in to Nextcloud; print it with grep ADMIN_PASSWORD .env. After your first login, change it to your own in the personal settings and keep it in a password manager.
The Caddyfile (nano Caddyfile):
{$DOMAIN} {
	log
	header Strict-Transport-Security "max-age=15552000; includeSubDomains"
	redir /.well-known/carddav /remote.php/dav 301
	redir /.well-known/caldav /remote.php/dav 301
	reverse_proxy nextcloud:80
}
What the lines do. log turns on the request log. Without it Caddy records nothing, and you cannot see who is hitting your server or from where. The Strict-Transport-Security header (HSTS) tells the browser to open the site over HTTPS only, for six months. The browser remembers this until it expires, so add the header once HTTPS already works for you. The two redir lines are for the calendar and contacts apps on phones: they look for the server at the standard addresses /.well-known/caldav and /.well-known/carddav, and redir sends those requests on to /remote.php/dav. The Nextcloud documentation recommends doing these redirects at the proxy. The last line hands everything else to the Nextcloud container.
The compose.yaml file (nano compose.yaml):
services:
  caddy:
    image: caddy:2
    restart: unless-stopped
    ports:
      - "80:80"
      - "443:443"
    environment:
      - DOMAIN
    volumes:
      - ./Caddyfile:/etc/caddy/Caddyfile:ro
      - caddy_data:/data
    networks:
      - internal
    depends_on:
      - nextcloud

  nextcloud:
    image: nextcloud:35-apache
    restart: unless-stopped
    environment:
      - POSTGRES_HOST=db
      - POSTGRES_DB=nextcloud
      - POSTGRES_USER=nextcloud
      - POSTGRES_PASSWORD
      - REDIS_HOST=redis
      - NEXTCLOUD_ADMIN_USER
      - NEXTCLOUD_ADMIN_PASSWORD
      - NEXTCLOUD_TRUSTED_DOMAINS=${DOMAIN}
      - TRUSTED_PROXIES=172.28.0.0/24
      - OVERWRITEPROTOCOL=https
    volumes:
      - nextcloud_data:/var/www/html
    networks:
      - internal
    depends_on:
      - db
      - redis

  cron:
    image: nextcloud:35-apache
    restart: unless-stopped
    entrypoint: /cron.sh
    volumes:
      - nextcloud_data:/var/www/html
    networks:
      - internal
    depends_on:
      - nextcloud

  db:
    image: postgres:17-alpine
    restart: unless-stopped
    environment:
      - POSTGRES_DB=nextcloud
      - POSTGRES_USER=nextcloud
      - POSTGRES_PASSWORD
    volumes:
      - db_data:/var/lib/postgresql/data
    networks:
      - internal

  redis:
    image: redis:7-alpine
    restart: unless-stopped
    networks:
      - internal

networks:
  internal:
    ipam:
      config:
        - subnet: 172.28.0.0/24

volumes:
  caddy_data:
  nextcloud_data:
  db_data:
The parts that are not obvious:
- Only Caddy’s ports 80 and 443 are open to the outside. The database, Redis and Nextcloud publish no ports; they talk over the internal network
internal. The reasoning is in the Docker article. - The network address is set by hand (
172.28.0.0/24).TRUSTED_PROXIESlists the proxies whose headers carrying the visitor’s real address Nextcloud will believe. The subnet has to be known in advance: if Docker handed out any address it liked, there would be nothing to list. If another project already uses this subnet, Docker answersinvalid pool request: Pool overlaps with other one on this address space. Pick another one, for example172.29.0.0/24, and change it in bothTRUSTED_PROXIESand thenetworkssection. OVERWRITEPROTOCOL=httpstells Nextcloud that people reach it over HTTPS, even though Caddy talks to it over plain HTTP. Without it, links and redirects would come out ashttp://.NEXTCLOUD_TRUSTED_DOMAINSis the list of addresses Nextcloud agrees to answer on. It rejects all others.- The image
nextcloud:35-apacheis pinned to major version 35:docker compose pullbrings updates within it and will not jump to the next major version behind your back. The tag appears in both services,nextcloudandcron. - The
croncontainer has a different entry point:/cron.shruns Nextcloud’s background jobs every five minutes. It shares the data volume with the main container. nextcloudinPOSTGRES_USERandPOSTGRES_DBis the database administrator’s name and the database name. PostgreSQL calls an account a role. Nextcloud’s working role will be a different one that it creates itself; more on that in the restore section below.
Validate the file, then start. The first start downloads about 2.7 GB of images, so give it a while:
docker compose config --quiet && echo OK
docker compose up -d
First install
On first start the container unpacks Nextcloud and creates the database by itself, usually in a couple of minutes. Rather than guess, ask Nextcloud whether it is ready:
docker compose exec -u www-data nextcloud php occ status
  - installed: true
  - version: 35.0.2.2
  - versionstring: 35.0.2
  - edition:
  - maintenance: false
  - needsDbUpgrade: false
  - productname: Nextcloud
  - extendedSupport: false
occ is Nextcloud’s own command-line tool, and almost all administration goes through it. Run it as the www-data user (that is what -u www-data does), otherwise the files end up with the wrong owner. Until you see installed: true, wait.
Open your domain in a browser. You get the “Log in to Nextcloud” form: the user admin and the password from .env.
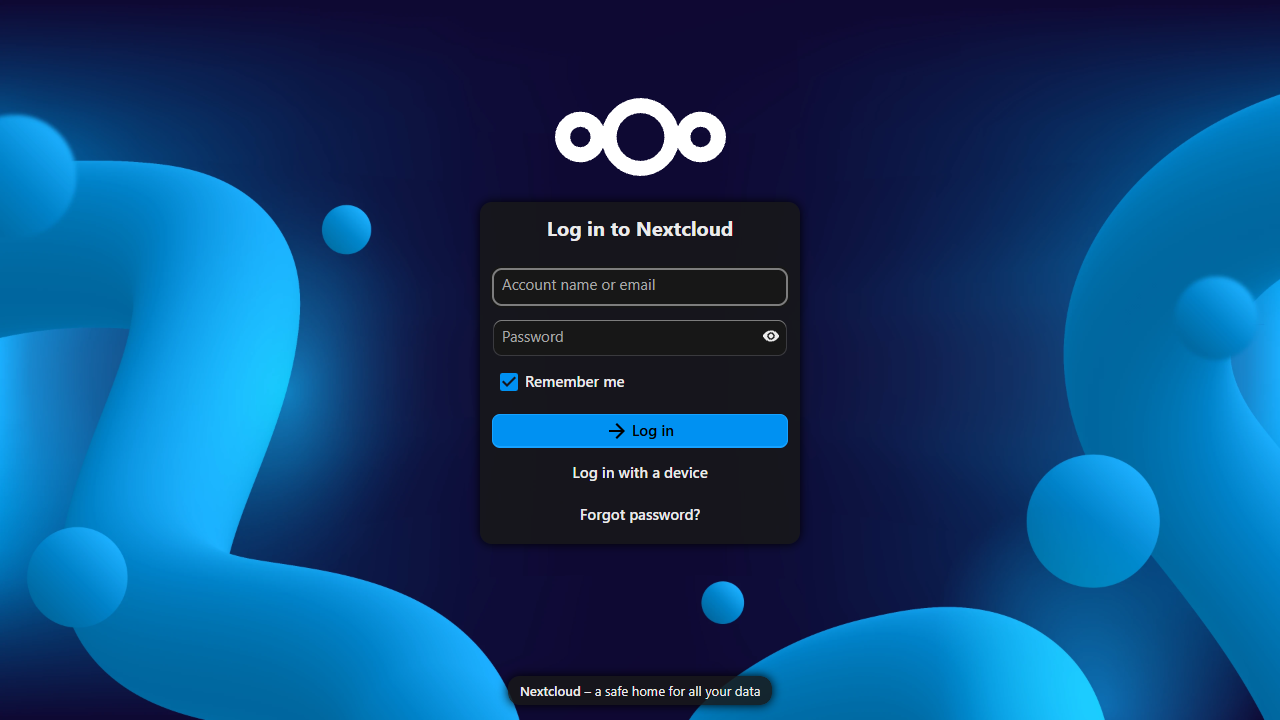
After login Nextcloud shows a few welcome windows; close them. Then open the account menu in the top-right corner, go to Administration settings, and pick Overview in the sidebar. The panel titled “Security & setup warnings” on that page collects the security and configuration checks.
Warnings after install: what they mean and how to clear them
The same checks run from the console: docker compose exec -u www-data nextcloud php occ setupchecks. On a fresh install with our files they raised four issues, and each has its own fix.
1. Background jobs are not running. The “Cron last run” check said (Nextcloud prints its check text in English):
✗ Cron last run: Last background job execution ran 56 years ago. Something seems wrong.“56 years ago” means a background job has never run. This was right after startup: the cron container fires every five minutes and may simply not have had its turn yet. But by default Nextcloud runs background jobs when someone opens a page (AJAX mode), and on a server it is better to use cron mode, where a separate container does the work. Switch it:
docker compose exec -u www-data nextcloud php occ background:cron
Set mode for background jobs to 'cron'
2. No maintenance window (check “Maintenance window start”). This is the time of day when Nextcloud runs its heavy daily jobs. Without it they can start in the middle of the working day. Choose your own value: find the quiet night hours in your local time and convert them to UTC. The window lasts four hours from the start you set:
docker compose exec -u www-data nextcloud php occ config:system:set maintenance_window_start --type=integer --value=1
System config value maintenance_window_start set to integer 1
Ours became “from 1:00 to 5:00 UTC”.
3. Mimetype migrations are pending (check “Mimetype migrations available”). This is a one-off operation that Nextcloud does not run on its own during an upgrade, because on large installs it takes a long time. On a clean install it takes seconds:
docker compose exec -u www-data nextcloud php occ maintenance:repair --include-expensive4. HSTS is not being sent (check “HTTP headers”). We had added the header to the Caddyfile, and the check still complained. Nextcloud seems to test itself at its own address, bypassing Caddy. Give it the real address (use your own domain):
docker compose exec -u www-data nextcloud php occ config:system:set overwrite.cli.url --value=https://cloud.example.com/After that the check reported: “Your server is correctly configured to send security headers”. If you edit the Caddyfile after launch, apply the change without restarting the container: docker compose exec caddy caddy reload --config /etc/caddy/Caddyfile.
One optional warning, “Default phone region”, is about a default country code for phone numbers in profiles. To clear it, set your own country (replace DE with your code):
docker compose exec -u www-data nextcloud php occ config:system:set default_phone_region --value=DEThis is how the admin page looks afterwards:
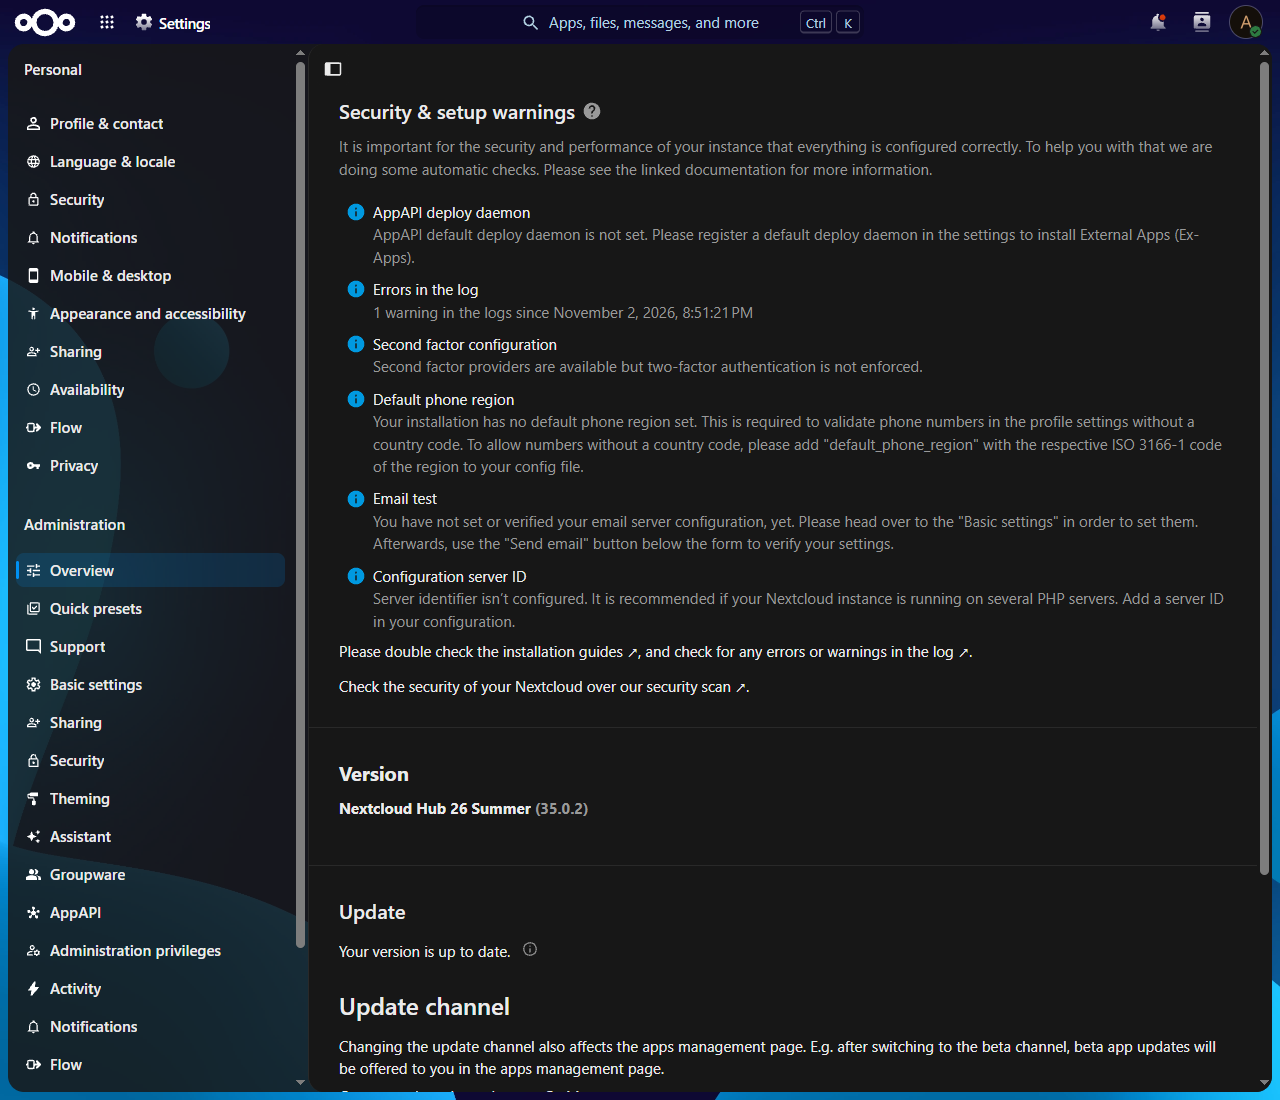
What remains is informational: “AppAPI deploy daemon” (only needed for external apps), “Second factor configuration” and “Email test” (reminders about two-factor authentication and email setup), and “Configuration server ID” (needed if Nextcloud runs on several PHP servers). The console check has two more items about client address detection, Brute-force Throttle and Forwarded for headers. A request from the console has no client address, so they fire there, and the web interface does not show these warnings. Set up email and two-factor authentication yourself: the first is needed for password resets, the second protects your login.
The “Errors in the log” warning (the console shows “2 errors in the logs since…”) points to two entries from the very first minutes. The first run of the background jobs from the console ended with a database exception (duplicate key value violates unique constraint "class_index"), while a repeat run of cron.php finished with exit code 0. It looks like the jobs were being registered at the same time the cron container was running. If you see only one or two log entries and the count stops growing, you can leave it.
Testing it: upload a file over WebDAV
You can upload a file from the browser, but it is worth checking that WebDAV works too, since that protocol is what the sync clients use. We create a file, send it with a request and read it back. A password on the command line lands in your shell history, so on a production server do this once and clear the history, or use an app password from the personal settings:
echo "hello from webdav" > hello.txt
curl -u admin:PASSWORD -T hello.txt -w "http=%{http_code}\n" https://cloud.example.com/remote.php/dav/files/admin/hello.txt
http=201
curl -u admin:PASSWORD https://cloud.example.com/remote.php/dav/files/admin/hello.txt
hello from webdav
Code 201 means the file was created. Now the redirect for calendars:
curl -sI https://cloud.example.com/.well-known/caldav
HTTP/2 301
location: /remote.php/dav
Now in the Nextcloud apps for phone and desktop it is enough to enter https://cloud.example.com, your login and your password.
Upload limit
The size of uploaded files is capped by the variables PHP_UPLOAD_LIMIT and PHP_MEMORY_LIMIT. According to the image documentation both default to 512 MB. To upload bigger files, add the line - PHP_UPLOAD_LIMIT=2G to the environment section of the nextcloud service and recreate the container with docker compose up -d.
Backup
You need to copy two things: the database, and the /var/www/html directory inside the container (on the host it is the volume nextcloud_data), which holds the configuration, your files and the installed apps. To keep the copies consistent, switch on maintenance mode for the duration; the site is unavailable while it is on:
mkdir -p ~/backups
docker compose exec -u www-data nextcloud php occ maintenance:mode --on
docker compose exec -T db pg_dump -U nextcloud nextcloud | gzip > ~/backups/nextcloud-db-$(date +%F).sql.gz
docker run --rm -v nextcloud_nextcloud_data:/data:ro -v ~/backups:/backup alpine \
  tar czf /backup/nextcloud-files-$(date +%F).tgz -C /data .
docker compose exec -u www-data nextcloud php occ maintenance:mode --off
chmod 600 ~/backups/nextcloud-*
What the commands do. exec -T turns off the pseudo-terminal, otherwise the pg_dump output gets corrupted. pg_dump -U nextcloud nextcloud dumps the database to text and gzip compresses it. The second docker run packs the files volume, the same way as in the n8n article. Mode 600 on the archives matters because they contain config.php with passwords. If any command fails along the way, remember to switch maintenance mode off by hand: that is the last occ command, with --off.
On our clean install the database dump was 319 KB and the directory archive 348 MB. The archive includes the Nextcloud code, so on a working server it will be larger than your files alone. The volume name nextcloud_nextcloud_data is the project folder name plus the volume name; look up yours with docker volume ls. Keep .env, compose.yaml and Caddyfile alongside the archives: without the passwords from .env, a restore stalls at the first step.
We tested the database restore on a separate, empty PostgreSQL (do the same: another machine or a separate project, not your live database). The first attempt gave 242 identical errors:
ERROR: role "oc_admin" does not existDuring installation Nextcloud creates its own role in the database. Ours is called oc_admin, and it owns the tables. The role’s name and password are stored in config.php as dbuser and dbpassword, and you can read them like this:
docker compose exec -u www-data nextcloud php occ config:system:get dbuser
oc_admin
docker compose exec -u www-data nextcloud php occ config:system:get dbpassword
This role has to exist before the restore. Create it first with the same password, then load the dump (use the name of your own file from ~/backups):
docker compose exec -T db psql -U nextcloud -d nextcloud -c "CREATE ROLE oc_admin LOGIN PASSWORD 'PASSWORD_FROM_CONFIG_PHP'"
gunzip -c nextcloud-db-2026-10-30.sql.gz | docker compose exec -T db psql -U nextcloud -d nextcloud -q
After that there were no errors: 138 tables were restored and the administrator account was in place. Keep copies off this server and test a restore from time to time: a backup you have never restored is still only an assumption.
Upgrading
Updates within version 35 arrive like this:
docker compose pull
docker compose up -d
Take a backup first. Nextcloud upgrades its database and apps itself the first time the new container starts. Between major versions go one at a time, 35 → 36 → 37 and so on: the image documentation says you can only upgrade one major version at a time. To do that, change the tag in compose.yaml in both services, nextcloud and cron. Versions cannot be skipped, so do not put updates off for years.
What the log shows in the first minutes
As soon as the domain gets a certificate, it appears in the public certificate transparency logs, and bots watch those. Within minutes of launch we saw requests like these in the Nextcloud web server log:
"GET /.env HTTP/1.1" 404 ... "Mozilla/5.0 (l9scan/...; +https://leakix.net)"
"GET /.git/config HTTP/1.1" 404 ...
"GET /.env.local HTTP/1.1" 404 ...
There were eleven such lines in all. This is not a fault; it is what the ordinary internet looks like, with scanners hunting for forgotten files full of passwords. There are no such files in the site root, and Nextcloud answers 404. Simple habits help here: a long administrator password, two-factor authentication, updates as they come out, and database and Redis ports closed to the internet (in our layout they are not published at all).
The visitor’s address does not show in the nextcloud container log. You see Caddy’s address instead (172.28.0.6 for us), because requests arrive through the proxy. Look for real addresses in the Caddy log: docker compose logs caddy, where request entries carry a remote_ip field.
FAQ
Can I use MariaDB instead of PostgreSQL?
Yes. Nextcloud supports both databases, and the image documentation has MariaDB examples. We used PostgreSQL and tested that one.
Do I need Redis with a single user?
The system works without it, but Redis takes 12 MB and takes load off the database during sync, so we kept it.
The nextcloud container keeps restarting. What should I do?
Read the last lines of the log: docker compose logs --tail 50 nextcloud. The usual causes are a database that has not started yet, or a mistake in .env. If the container restarts because it runs out of memory, a swap file can help, but a bigger server is the more reliable fix.
How do I add a second service to the same server?
Add a block with another subdomain to the Caddyfile and connect the new service’s container to the internal network, otherwise Caddy cannot find it. One Caddy then serves every service, and ports 80 and 443 stay with it alone.
What next
Docker basics are in Docker and Docker Compose on a VPS. If you want to automate things, for example send a notification when something happens, see the article on n8n. You can pick a server for these tasks on the VPS plans page.
Related
All articles
How to Install n8n on a VPS with Docker Compose
You can run n8n on your own VPS with Docker Compose in a single evening: two containers (n8n itself and Caddy, a reverse proxy that issues the HTTPS certificate for you), three small files and one start command. Below you…

RDP for two users on Windows Server 2016-2025: setup guide
By default, Windows Server 2016, 2019, 2022 and 2025 let two administrators connect over RDP at the same time, and you don’t need to buy Remote Desktop licenses for it. Below: how this works, how resources are shared, and a…